DSS: Redefining Biotechnology & Life Science in India


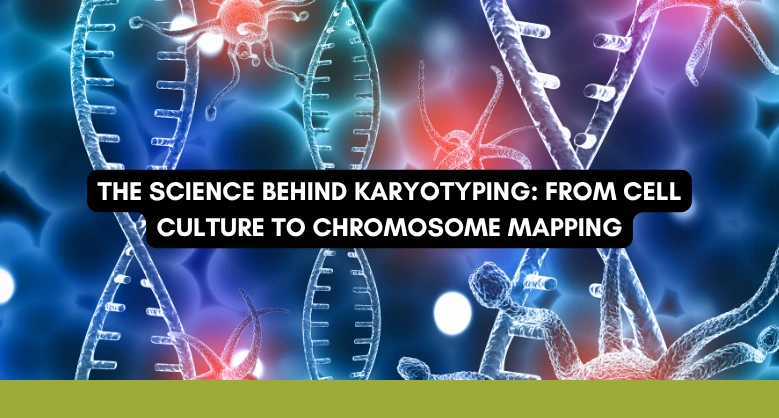
The Science Behind Karyotyping: From Cell Culture to Chromosome Mapping
In the nucleus of every one of your cells, your entire genetic blueprint is meticulously packaged into structures called chromosomes. This “book of life” contains every instruction that makes you who you are. A karyotype is, in essence, the “table of contents” for this book. It is a snapshot of an individual’s complete set of chromosomes, systematically organized in pairs and arranged by size, from largest to smallest. This powerful diagnostic tool, a cornerstone of cytogenetic analysis, allows clinicians and scientists to “read” the large-scale structure of your genome, searching for the chromosomal abnormalities detection that can cause genetic disorders, infertility, and cancer.
But how karyotyping works is not as simple as just putting a cell under a microscope. Chromosomes are only visible at a very specific and fleeting moment in a cell’s life. The karyotyping process is a masterful blend of biology, chemistry, and microscopy, a multi-day journey that coaxes living cells to divide, freezes them in time, and meticulously lays out their genetic material for inspection.
This is the story of that journey, a detailed look at the steps in karyotyping, from a simple blood draw to the final, intricate chromosome map. We will explore why cell culture is needed in karyotyping, how technicians prepare cells for analysis, and the sophisticated imaging techniques that bring our chromosomes to light.
The crucial first step is isolating and culturing living cells
The entire karyotyping process begins with a viable biological sample. For a routine postnatal or adult analysis, the most common sample is a peripheral blood draw, collected in a sodium heparin (green-top) tube. For prenatal diagnosis, the sample may be amniotic fluid (containing fetal amniocytes) or a chorionic villus sample (CVS). In cancer diagnostics, it is often a bone marrow aspirate or a piece of a solid tumor.
But a critical problem must be overcome. Most of the cells in these samples are not actively dividing. The T-lymphocytes in your blood, for example, are in a resting, non-dividing state known as the G0 phase of the cell cycle. This poses a problem because chromosomes, in their familiar “X” shape, only exist during mitosis (cell division). In a resting cell, the DNA is uncoiled into a long, tangled mass called chromatin, making it impossible to analyze.
This is why cell culture is needed in karyotyping. We cannot analyze cells that are not dividing. Therefore, the first step is to bring these resting cells “to life” in a laboratory setting.
This process of cell culture chromosome analysis involves several key steps:
- Aseptic Technique: The sample is handled in a sterile biological safety cabinet to prevent contamination from bacteria or fungi, which would quickly overrun the culture.
- Inoculation: A small amount of the sample (e.g., blood) is added to a flask or tube containing a sterile, nutrient-rich “broth” called a culture medium. This medium contains salts, sugars, amino acids, and other essential building blocks for cell growth.
- Stimulation (Mitogen): To “kick-start” the resting T-lymphocytes into dividing, a mitogen is added. The most common one is Phytohemagglutinin (PHA), a plant-based lectin that stimulates T-cell proliferation. This is the “on” switch for the cell culture.
- Incubation: The flask is placed in a specialized incubator, a warm (37°C, 98.6°F), humidified environment with a controlled atmosphere (typically 5% CO2) that mimics the conditions inside the human body.
The cells are left to grow and divide for 48 to 72 hours (for blood) or even 7 to 10 days (for amniocytes, which grow more slowly). During this time, the single T-cell we started with multiplies into a large population of actively dividing cells, providing the raw material for the next phase.
We must stop cell division at the perfect moment in time
Now that we have a bustling culture of dividing cells, we face the next challenge: catching them at the right time. Mitosis is a fast, dynamic process. The specific stage we need is metaphase, the single point in the cell cycle where the chromosomes are at their most condensed and are neatly aligned along the cell’s “equator.” This is the only moment they are distinct, X-shaped, and countable.
To “arrest” a large number of cells in this perfect state, a chemical is added to the culture. This is the metaphase chromosome preparation step.
The chemical of choice is colchicine, or a synthetic derivative called colcemid. Colchicine is a mitotic spindle inhibitor. It works by preventing the formation of microtubules, which are the “ropes” that form the mitotic spindle. In a normal division, this spindle is responsible for pulling the chromosome pairs apart into the two new daughter cells.
By adding colchicine, we sabotage this process. The cell proceeds normally to metaphase, but the spindle fails to form. The cell effectively gets “stuck” in metaphase, unable to proceed to the next stage (anaphase). This arrest is timed perfectly, typically lasting 1-2 hours, to allow a large population of cells in the culture flask to reach metaphase and become “trapped” there, creating a high metaphase index.
This is one of the most critical steps in karyotyping. Without a mitotic inhibitor, finding a cell in metaphase would be like trying to photograph a specific bird that only lands on a branch for a fleeting moment. Colchicine makes the bird land and stay put.
We must prepare the chromosomes for slide analysis
Once we have our culture flask full of cells arrested in metaphase, the “harvesting” process begins. This phase is a delicate work of cellular chemistry, designed to take a 3D, living cell and splay its chromosomes flat onto a 2D glass slide.
Step 1: The Hypotonic Shock First, the cells are gently collected and spun down in a centrifuge. The old, colcemid-laced medium is poured off. The cells are then “resuspended” in a hypotonic solution, which is typically warm potassium chloride (KCl).
This is a brilliant and essential step. A hypotonic solution has a lower salt concentration than the intracellular fluid. Due to the principle of osmosis, water rushes into the cells to try and balance the salt concentration. This causes the cells to swell up like balloons. This swelling is crucial for two reasons: it makes the cell membrane fragile and, most importantly, it spreads the 46 condensed chromosomes apart from each other inside the cell. Without this step, the chromosomes would be clumped together in a tangled, unreadable mass.
Step 2: Fixation After a precise incubation in the hypotonic solution, a “fixative” is added. The standard fixative in cytogenetics is Carnoy’s fixative, a harsh mixture of 3 parts methanol and 1 part glacial acetic acid. This is usually added slowly at first, then in larger volumes, “washing” the cells several times.
The fixative has multiple jobs:
- It “fixes” (kills and preserves) the cells, stopping all biological processes.
- It removes water, hardening the cell membranes and chromosomes.
- It lyses (breaks open) any remaining red blood cells, which would otherwise clutter the slide.
- It “cleans” the chromosomes, removing many of the proteins that obscure them.
After several washes, the final product is a “pellet” of fixed, fragile, metaphase-arrested cells at the bottom of a test tube, suspended in a small amount of fresh fixative.
Step 3: The Art of Slide Preparation for Karyotyping This is the part of the process that is as much art as it is science. The technologist takes a small drop of the cell suspension using a pipette. Then, from a carefully controlled height (sometimes several feet), they “drop” the suspension onto a cold, wet, or humidified glass slide.
The physics of this moment is what makes or breaks the karyotype. As the drop hits the slide, the fixative spreads out and evaporates almost instantly. The force of the drop, combined with the fragile and swollen state of the cell membrane (resulting from the hypotonic solution), causes the cell to burst open. The 46 chromosomes, which were neatly contained within, “splay” out and adhere to the glass slide in a two-dimensional “metaphase spread.” .
The quality of this spread is everything. A cytogeneticist needs to find spreads where the chromosomes are well-separated, not overlapping, and all 46 are present. The technologist controls this by meticulously adjusting the drop height, the temperature and humidity of the room, and the angle of the slide.
We must “paint” the chromosomes to reveal their identity
If you were to look at the slide now under a microscope, you would see the 46 chromosome shapes. But you would have no way to tell them apart. Chromosomes 19 and 20, for example, are very similar in size and shape. To identify them and look for subtle abnormalities, we need to add a “barcode.”
This is achieved through a staining technique called banding. The gold standard in nearly every cytogenetics lab is G-banding, or Giemsa banding.
The slide preparation for karyotyping with G-banding involves a few more steps:
- Aging: The slides, which are now covered in metaphase spreads, are first “aged.” This can be done by letting them sit for a few days or, more commonly, by baking them in a special oven for a period. This “aging” helps to denature the chromosomal proteins, preparing them for the next step.
- Trypsin Treatment: The aged slides are briefly dipped into a solution containing trypsin, a digestive enzyme. The trypsin “eats away” at the proteins that package the DNA. Critically, it digests the protein-rich, gene-rich “euchromatin” regions more than it digests the tightly packed, gene-poor “heterochromatin” regions.
- Giemsa Staining: Finally, the slides are submerged in Giemsa stain. This is a special dye mixture that preferentially binds to the AT-rich (Adenine-Thymine) regions of DNA.
The result is a miracle of cytochemistry. The regions of the chromosome that were less digested by trypsin (the dense, AT-rich heterochromatin) soak up more of the Giemsa stain. This creates a highly reproducible pattern of dark bands (G-positive bands) and light bands (G-negative bands) along the length of each chromosome.
This unique barcode is the key. Every chromosome pair has its own internationally standardized banding pattern, allowing a trained technologist to identify not only chromosome 1 from chromosome 2, but also to detect subtle missing pieces (deletions), extra pieces (duplications), or pieces that have been swapped between chromosomes (translocations).
We must analyze the images and assemble the final map
Now, at last, the analysis can begin. The stained slide is placed under a microscope used in karyotyping. This is a high-power, high-resolution light microscope equipped with a digital camera and specialized software.
A cytogeneticist or technologist will scan the slide, often at low power, “hunting” for the best metaphase spreads. They are looking for cells that are “euploid” (contain 46 chromosomes) and are not broken or overlapping.
Once a high-quality spread is found, the technologist switches to a high-power oil-immersion lens (100x magnification) to analyze it. In the past, this was an astonishingly manual process. The technologist would:
- Take a photograph of the spread.
- Print the photograph in a darkroom.
- Use a small pair of scissors to physically cut out each of the 46 chromosomes from the picture.
- Arrange them, one by one, on a piece of cardboard, pairing them up and ordering them by size and banding pattern to create the final “karyogram.”
Today, this is how chromosome images are analyzed using digital software. The technologist captures a digital image of the spread. Then, using the software, they “click” on each chromosome. The software, using an algorithm that recognizes size, centromere position, and banding pattern, suggests its identity (e.g., “This is a chromosome 9”). The technologist then reviews, corrects, and organizes all 46 chromosomes on the screen to create the final, standardized karyotype.
The technologist will analyze multiple spreads (typically 10-20) to ensure the result is consistent and not just an artifact in a single cell. They are looking for any deviation from the norm:
- Numerical Abnormalities: Are there 47 chromosomes (e.g., Trisomy 21, Down syndrome) or 45 (e.g., Monosomy X, Turner syndrome)?
- Structural Abnormalities: Are all 46 chromosomes present but structurally intact? Is there a piece of chromosome 8 missing? Is a piece of chromosome 9 attached to chromosome 22 (a translocation famous in leukemia)?
Advanced techniques can “paint” chromosomes with light
G-banding is the workhorse, but it has limitations. It is a low-resolution technique. It cannot detect very small microdeletions, and it can sometimes miss “cryptic” translocations if the swapped pieces are of similar size and banding pattern.
This is where modern molecular cytogenetics comes in. The most visually stunning of these is Spectral Karyotyping (SKY), also known as spectral imaging in chromosome analysis.
This technique clearly illustrates the difference between G-banding and spectral karyotyping:
- G-Banding uses a single stain to create a monochrome barcode based on protein density.
- Spectral Karyotyping uses a cocktail of fluorescent dyes to “paint” each chromosome pair a different, unique color.
In SKY, 24 different “probe” cocktails are created, one for each chromosome (1-22, X, and Y). Each cocktail is a mix of fluorescent dyes. These probes are applied to the metaphase slide, where they “hybridize” or stick to their matching chromosome.
When viewed under a special fluorescence microscope used in karyotyping and interpreted by a sophisticated computer, the result is a breathtaking, multi-colored spread. Chromosome 1 might be bright yellow, chromosome 2 red, chromosome 3 green, and so on.
The power of this is particularly evident in complex cases, such as those involving cancer. If a cell has a highly “rearranged” genome, a G-banded analysis would be an unreadable mess. With SKY, a translocation is glaringly obvious: a technologist will instantly see a chromosome that is, for example, half-red and half-green, clearly showing that a swap has occurred between chromosomes 2 and 3. This is a level of chromosomal abnormalities detection that G-banding can never achieve.
The final analysis is a blend of time and expertise
So, after all these intricate cytogenetic analysis steps, how long does karyotyping take from the patient’s perspective?
The timeline is a direct reflection of the biology involved:
- Cell Culture: This is the longest part. 48-72 hours for a blood sample, but up to 7-10 days for amniotic fluid or solid tissue samples.
- Harvesting, Slide Prep & Staining: This is typically a full day’s work in the lab.
- Analysis: A technologist may spend several hours scanning and analyzing the slides for a single case.
- Review and Report: A senior cytogeneticist or director reviews the case and signs out the final report.
From the moment the sample arrives in the lab, a routine blood karyotype typically takes 7 to 10 days, while a prenatal amniotic fluid karyotype often takes 10 to 14 days. This waiting period can be anxious for patients, but it is necessary to allow the cells to grow and mature.
The final report is a simple, powerful line of text, an international shorthand that summarizes all this work: 46, XX is a normal female. 47, XY,+21 is a male with Trisomy 21 (Down syndrome). 46, XX,t(9;22)(q34;q11.2) is a female with the Philadelphia chromosome, a defining translocation in chronic myeloid leukemia.
From a living cell in a flask to a high-resolution digital map, the karyotyping process remains one of the most fundamental and informative tests in medicine. It is a perfect example of how cell biology, chemistry, and microscopy work in concert to provide us with a profound insight into the very architecture of our own genome.
Faq’s :-
1. What is karyotyping?
Karyotyping is a laboratory technique used to examine the number, size, and structure of chromosomes in a cell.
2. Why is karyotyping important in genetics?
It helps identify chromosomal abnormalities associated with genetic disorders and certain diseases.
3. How is karyotyping performed in laboratories?
The process involves cell culture, chromosome staining, microscopic imaging, and chromosome analysis.
4. What diseases can be detected using karyotyping?
Karyotyping can detect genetic disorders such as Down syndrome, Turner syndrome, and certain cancers.
5. What is chromosome mapping?
Chromosome mapping identifies the location of genes on chromosomes and helps scientists understand genetic variations.
Latest Articles
National DNA Day 2026: Why DNA Matters for Modern Healthcare
BY Ms. Geddam Malini, Application & Product Specialist, DSS Imagetech 24th April 2026
Every cell in our body carries DNA, the code of life. April 25 marks DNA Day, it highlights advances in genomic research and encourages education in genetics. While DNA was...
Read More
World Health Day 2026: Strengthening Universal Health Coverage Through Science...
BY Ms. Janhavi Srirangaraj, Product Specialist 7th April 2026
Every year on April 7, the global community pauses to observe World Health Day, marking the founding of the 1st World Health Assembly, the World Health Organization (WHO) in 1948....
Read More
World Tuberculosis Day: “Spreading Awareness, Saving Lives”
BY Mr. Satendra Saxena, Application Specialist, DSS Imagetech 23rd March 2026
Every time on March 24, the world pauses to observe World Tuberculosis (TB) Day. It’s a day of mixed feelings. We celebrate the scientific improvements that have made this complaint...
Read More